Luxonis OAK-1 Camera Integration
In this tutorial we will go through the process of connecting a Luxonis OAK-1 camera to your Leo Rover and integrating it with the system using ROS.
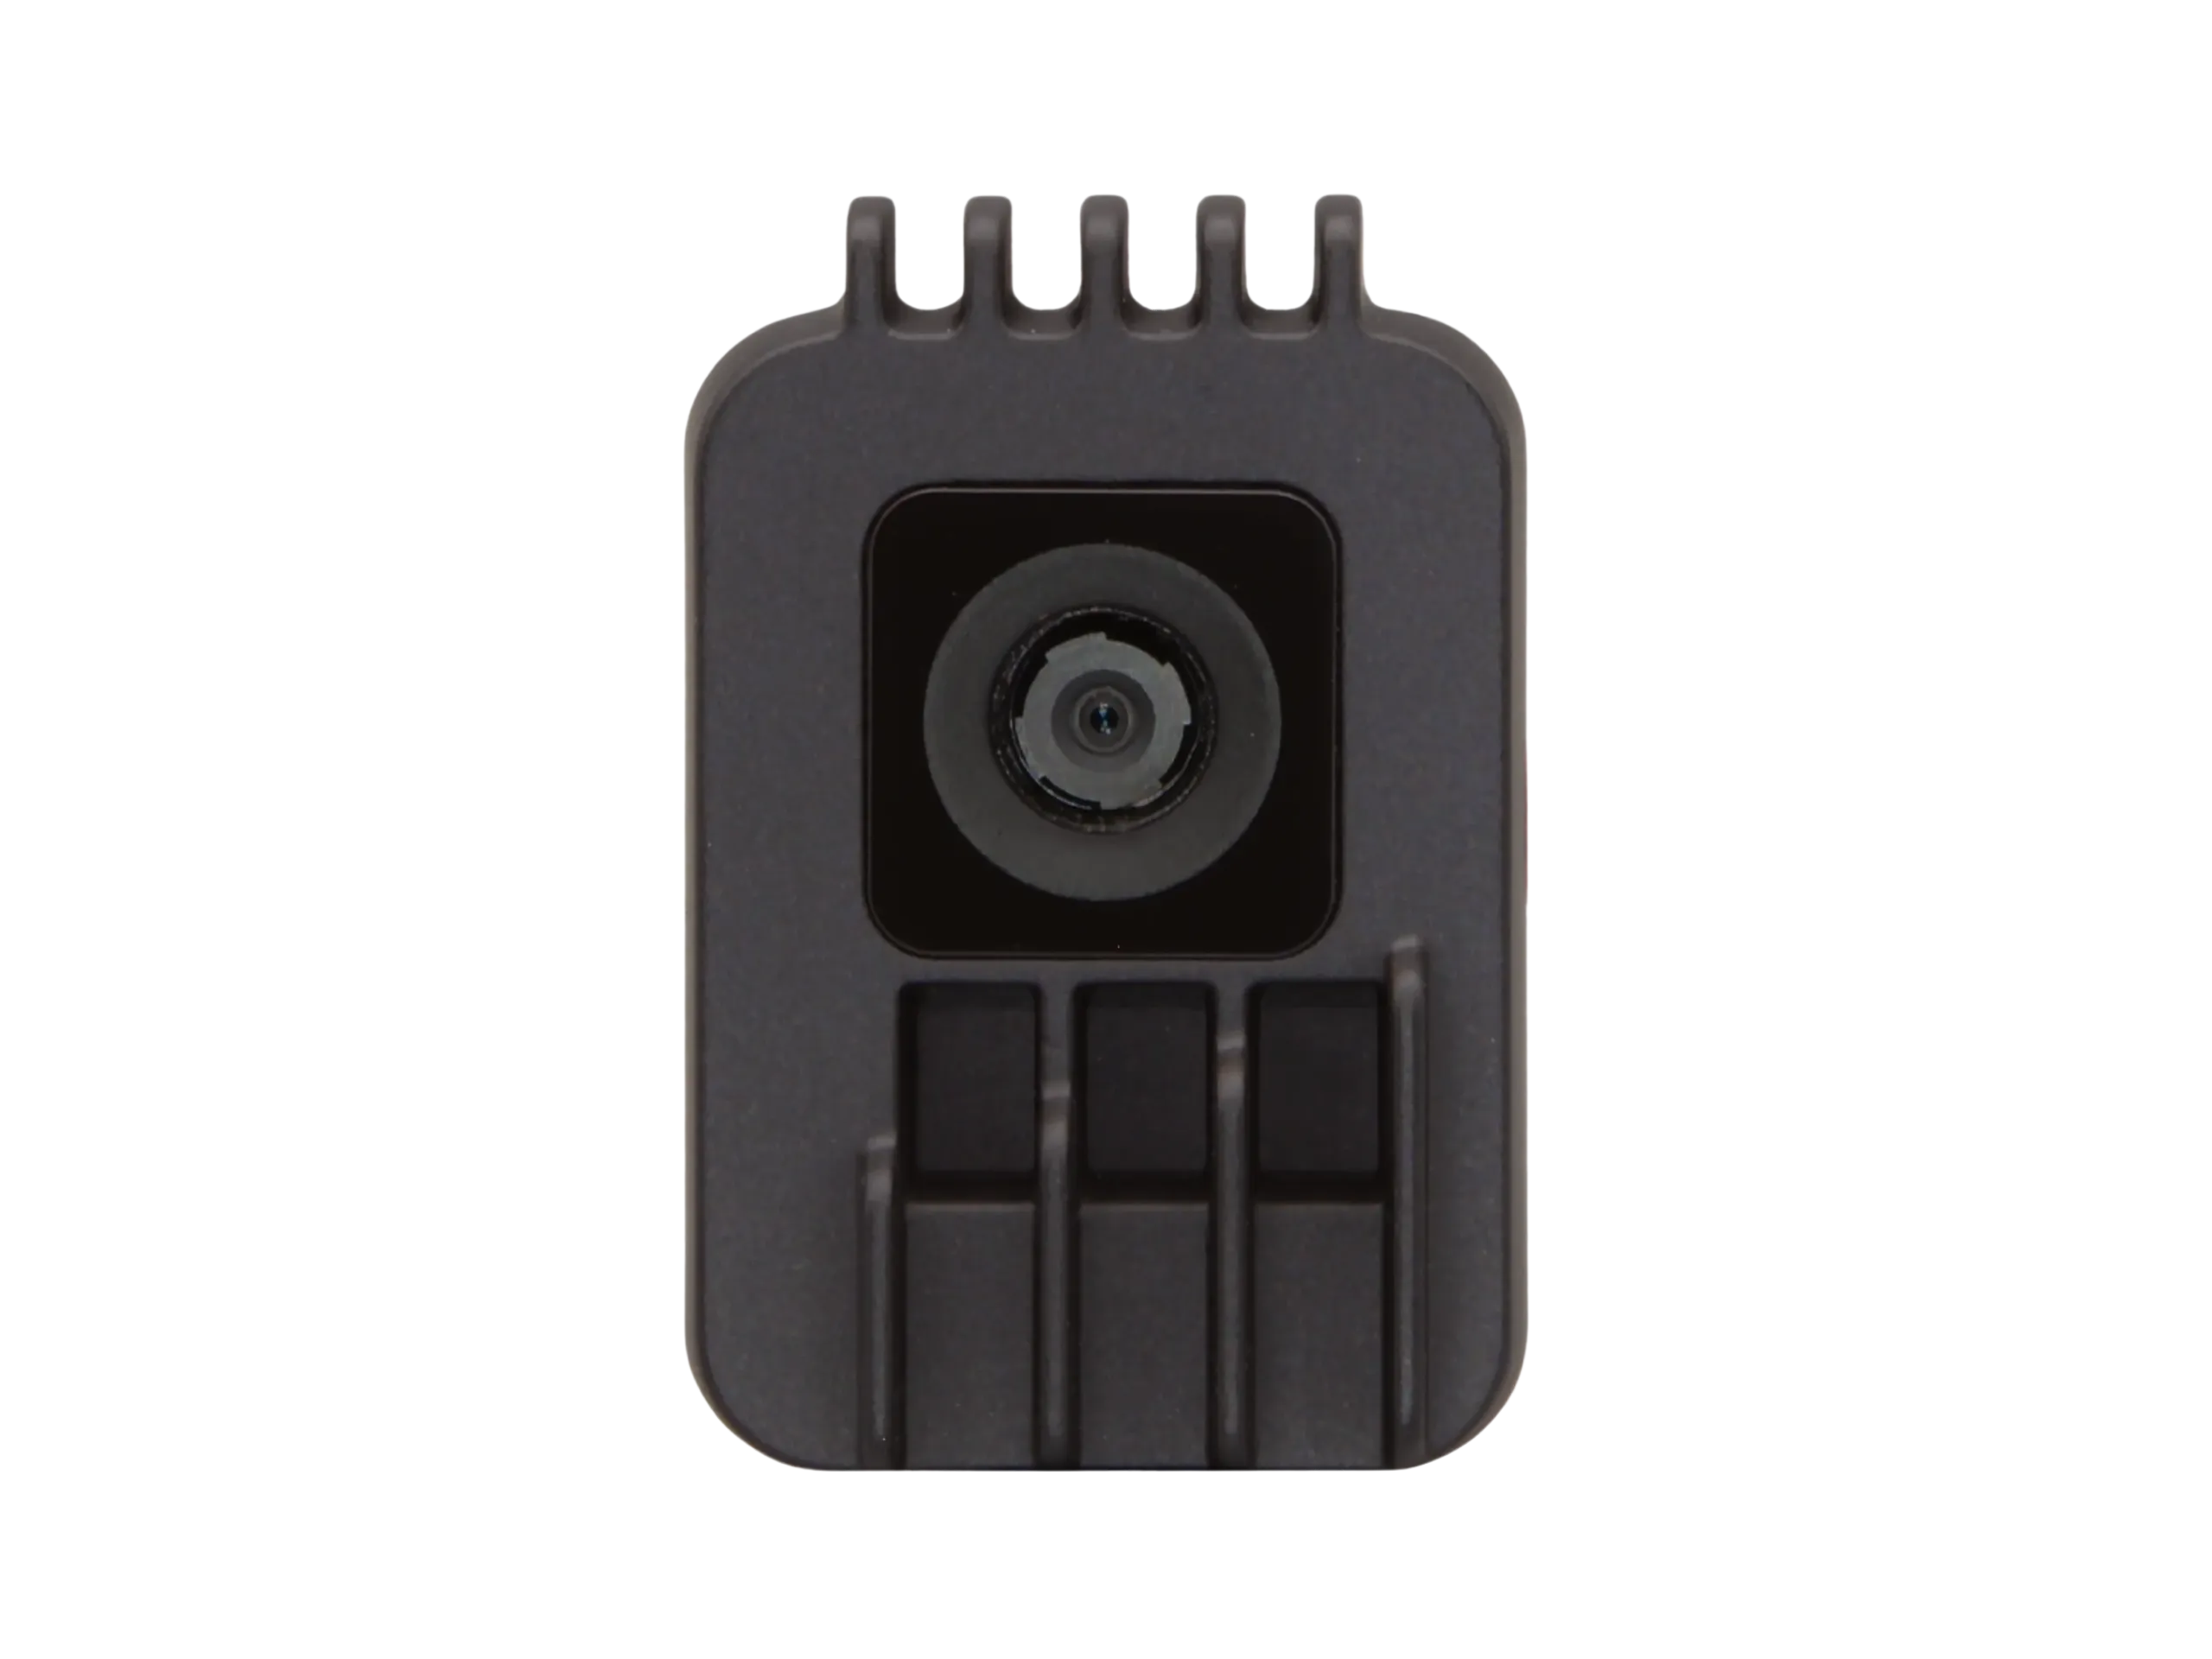
OAK-1 is a compact AI camera for robotic vision that combines a high-resolution 12MP color sensor with on-device Neural Network inferencing and Computer Vision capabilities provided by the built-in Myriad X VPU. Thanks to that, tasks like object detection or tracking can run directly on the camera, without putting any load on the rover's computer. The camera uses USB-C for both power and USB3 connectivity. In robotics, cameras like this are commonly used for object recognition, visual tracking and many other computer vision applications.
What to expect?
After completing this tutorial, you will have a Luxonis OAK-1 camera mounted on your Leo Rover, and you will be able to access the camera's data through ROS topics, such as:
/oak/rgb/image_raw- the RGB image stream,/oak/rgb/image_raw/compressed- the compressed RGB image stream,/oak/rgb/camera_info- the camera calibration data.
You will also learn how to use the camera's on-device AI capabilities by running an object detection example. The image below shows its final result - the camera stream with the detected objects marked with bounding boxes, visualized in RViz:

Prerequisites
Referenced products
Hardware integration
Software integration
The first thing you can do is to make sure your device has the correct permissions. To do this, you can add the following rule to the udev service:
SUBSYSTEM=="usb", ATTRS{idVendor}=="03e7", MODE="0666"
Paste this line to /etc/udev/rules.d/luxonis.rules file and reload udev rules
by typing:
sudo udevadm control --reload-rules && sudo udevadm trigger
We want the sensor functionality to be available in the ROS ecosystem, so you should install a ROS package that provides a node for the camera.
sudo apt install ros-${ROS_DISTRO}-depthai-ros
Modifying the URDF model
As we want to have the camera model visible with the rover model, we need to
create an URDF file with the OAK included. Package depthai_descriptions is
installed alongside depthai-ros and it contains OAK camera models and xacro
macros that we can easily add (list of available models
here).
We need to include the correct macro to make the camera visible with the robot's
model. To do that create a new file in /etc/ros/urdf directory, and name it
oak-1.urdf.xacro. In this file, include the following content:
<?xml version="1.0"?>
<robot xmlns:xacro="http://www.ros.org/wiki/xacro">

  <xacro:include filename="$(find depthai_descriptions)/urdf/include/depthai_macro.urdf.xacro"/>

  <xacro:depthai_camera camera_name="oak"
                      camera_model="OAK-1"
                      base_frame="oak-1-base_frame"
                      parent="base_link"
                      cam_pos_x="0.0"
                      cam_pos_y="0.0"
                      cam_pos_z="0.0"
                      cam_roll="0.0"
                      cam_pitch="0.0"
                      cam_yaw="0.0"/>
</robot>
The camera_name property determines the names of the camera's TF frames and
topics. It has to be set to the same value as the name of the camera node that
we will launch later in this tutorial. The cam_<> properties specify the
camera's position and orientation in reference to the link set in the parent
property. As the parent property is set to "base_link", the position of the
camera is provided in reference to the origin of the Rover.
In the file above, the cam_<> properties are set to the default values. You
will have to adjust them to your mounting solution.
Now we have to include our camera model in robot.urdf.xacro file - the
description that is uploaded at boot. Add this line somewhere before the closing
</robot> tag.
<xacro:include filename="/etc/ros/urdf/oak-1.urdf.xacro"/>
Launching camera nodes
To get the image from camera, you need to launch the camera nodes. You can do it by using default DepthAI launcher:
ros2 launch depthai_ros_driver camera.launch.py
If you want to change the default parameters, you can do it while the node runs with the usage of RQt:
rqt
If you want the changes of parameters to persist across the runs, create a
.yaml configuration file in /etc/ros. This example contains configuration
for OAK-1 camera:
/oak:
  ros__parameters:
    oak.rgb.image_raw.enable_pub_plugins:
      ['image_transport/raw', 'image_transport/compressed']
    camera:
      i_pipeline_type: RGB
      i_nn_type: none
    rgb:
      i_publish_topic: true
      i_fps: 30.0
      i_resolution: 1080P
      i_isp_num: 2
      i_isp_den: 3
      i_output_isp: true
      i_width: 1280
      i_height: 720
You can modify the parameters in the file according to your needs and then launch:
ros2 launch depthai_ros_driver camera.launch.py params_file:=/etc/ros/oak.yaml
If your OAK-1 unit doesn't have an IMU, you will see this warning:
[WARN] [oak]: IMU enabled but not available!
It is harmless - the driver simply skips creating the IMU node and the camera
works normally. You can silence it by adding the pipeline_gen section to the
configuration file:
/oak:
  ros__parameters:
    pipeline_gen:
      i_enable_imu: false
For more information about oak configuration and usage examples you can check out the depthai-ros github repository.
(Optional) Launching camera nodes on system startup
To launch camera nodes with the created parameters file on system startup,
create a launch file in /etc/ros:
<launch version="0.1.1">
  <node name="oak" namespace="" pkg="depthai_ros_driver" exec="camera_node">
    <param from="/etc/ros/oak.yaml" />
  </node>

</launch>
You can set the namespace property of the node tag to whatever you want, but
the name has to be set to the same value as the camera_name in urdf file.
It's required for the camera data to be placed in correct TF frame.
Then in /etc/ros/robot.launch.xml add this line somewhere before the closing
</launch> tag:
<include file="/etc/ros/oak.launch.xml"/>
Now your OAK-1 camera ROS node will start at launch. You can also start them now by typing
ros-nodes-restart
Example usage
One of the capabilities of Luxonis OAK-1 Camera is running object detection
directly on the camera. To test it, we will run one of the depthai_filters
examples.
If you enabled launching the camera nodes on system startup, disable them now,
as the example starts its own camera node and two nodes can't connect to the
same device. To do so, remove the <include file="/etc/ros/oak.launch.xml"/>
line from /etc/ros/robot.launch.xml and restart ROS2 nodes:
ros-nodes-restart
Firstly, we need to modify the OAK parameters file to enable the neural network on the camera and pass through the image the network runs on:
/oak:
  ros__parameters:
    oak.rgb.image_raw.enable_pub_plugins:
      ['image_transport/raw', 'image_transport/compressed']
    camera:
      i_pipeline_type: RGB
      i_nn_type: rgb
    rgb:
      i_publish_topic: true
      i_fps: 30.0
      i_resolution: 1080P
      i_isp_num: 2
      i_isp_den: 3
      i_output_isp: true
      i_width: 1280
      i_height: 720
    nn:
      i_enable_passthrough: true
      i_disable_resize: false
Then run the example, passing the modified parameters file:
ros2 launch depthai_filters example_det2d_overlay.launch.py params_file:=/etc/ros/oak.yaml
Now you can switch to the PC connected to rover's access point and run RViz:
rviz2
In the RViz window add the visualization by selecting Image from /overlay
topic and clicking OK:
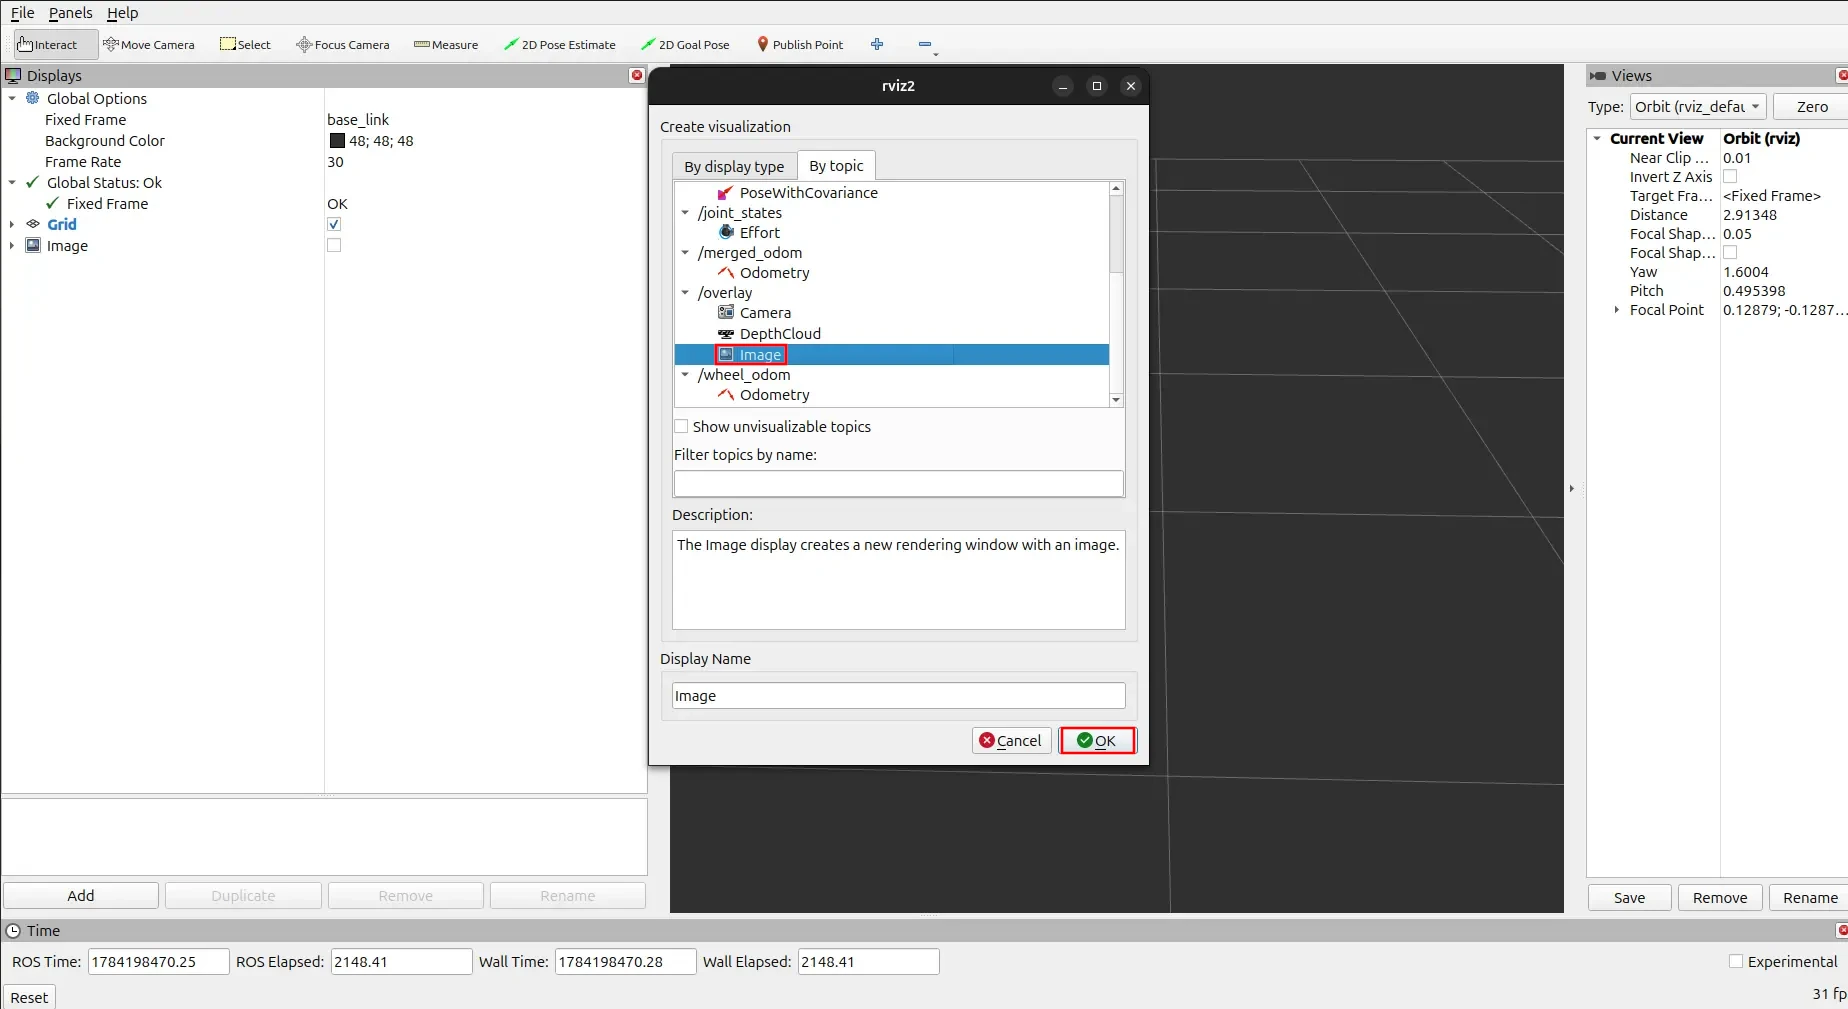
After doing so, you should be able to see the image from the camera with the bounding boxes and names of the detected objects, along with the confidence of each detection shown as a percentage:
The example uses the default detection network - a MobileNet-SSD model trained
on the PASCAL VOC dataset. It can detect 20 classes of objects, such as person,
car, bicycle, dog or bottle. You can find the full list of the detected classes
in the
label map
of the overlay node. To learn more about this and other examples from the
depthai_filters package, check out its
documentation.
What's next?
With the camera image available on ROS topics, you can use it in projects involving computer vision.
The OAK-1 can run neural network inference directly on the camera. To learn more about the camera's capabilities, check out the Luxonis documentation, and for more advanced configuration of the ROS driver, see the DepthAI ROS documentation.